zabbix中添加java/tomcat监控(JMX)
一、配置java/tomcat
tomcat
在
tomcat/bin/catalina.sh中位于Execute The Requested Command前添加如下内容tomcat/bin/catalina.sh 1
2
3
4
5
6
7
8
9
10...
CATALINA_OPTS="$CATALINA_OPTS
-Dcom.sun.management.jmxremote
-Djava.rmi.server.hostname=192.168.1.132
-Dcom.sun.management.jmxremote.port=10053
-Dcom.sun.management.jmxremote.ssl=false
-Dcom.sun.management.jmxremote.authenticate=false"
# ----- Execute The Requested Command -----------------------------------------
...也可以通过添加
tomcat/bin/setenv.sh来写入相关配置tomcat/bin/setenv.sh 1
2
3
4
5
6
7
8
export CATALINA_OPTS="$CATALINA_OPTS
-Dcom.sun.management.jmxremote
-Djava.rmi.server.hostname=192.168.1.132
-Dcom.sun.management.jmxremote.port=10053
-Dcom.sun.management.jmxremote.ssl=false
-Dcom.sun.management.jmxremote.authenticate=false"
其中:
- Djava.rmi.server.hostname: 为当前
tomcat所在服务器的 IP - Dcom.sun.management.jmxremote.port: 开启监控的端口
- Dcom.sun.management.jmxremote.ssl:
false表示不开启 SSL 协议 - Dcom.sun.management.jmxremote.authenticate:
false表示不需要用户名和密码访问
添加后启动/重启 tomcat,待 tomcat 启动完成后本地查看端口
1 | netstat -tnlp | grep 10053 |
jar
如果是以 java -jar sample.jar 包的方式直接直接运行,则在原有的命令基础上添加如下参数
1 | java -Dcom.sun.management.jmxremote \ |
带密码验证访问
以 tomcat 为例,配置修改为
1 |
|
其中:
Dcom.sun.management.jmxremote.authenticate:改为 true
Dcom.sun.management.jmxremote.access.file:设置访问权限
参考值:
readonly:只能读取
MBean的属性和接受通知。readwrite:还允许设置属性,调用方法,创建和删除
MBean。/data/tomcat8/jmx.access 1
2akiya readonly
admin readwrite
Dcom.sun.management.jmxremote.password.file:访问密码
/data/tomcat8/jmx.password 1
2akiya akiya_password
admin admin_password
创建完成上述文件后,修改文件权限
1 | chmod 400 /data/tomcat8/jmx.* |
然后重启tomcat即可。
二、zabbix-java-gateway
安装
CentOS
shell 1
yum -y install zabbix-java-gateway
ubuntu
shell 1
apt -y install zabbix-java-gateway
安装完成后修改 zabbix-java-gateway 的配置文件 /etc/zabbix/zabbix_java_gateway.conf
1 | ... |
保存并退出,然后修改 zabbix 配置文件 /etc/zabbix/zabbix_server.conf
1 | ... |
重启相关服务:
1 | service zabbix-java-gateway restart |
验证
在 zabbix-server 上通过 cmdline-jmxclient 验证
下载cmdline-jmxclient
shell 1
wget http://crawler.archive.org/cmdline-jmxclient/cmdline-jmxclient-0.10.3.jar
测试
无密码
shell 1
2
3
4
5
6java -jar cmdline-jmxclient-0.10.3.jar - 192.168.1.132:10053 java.lang:type=Memory NonHeapMemoryUsage
01/09/2020 14:16:47 +0800 org.archive.jmx.Client NonHeapMemoryUsage:
committed: 222887936
init: 2555904
max: 1593835520
used: 211949024有密码
shell 1
2
3
4
5
6java -jar cmdline-jmxclient-0.10.3.jar akiya:akiya_password 192.168.1.132:10053 java.lang:type=Memory HeapMemoryUsage
01/13/2020 14:47:10 +0800 org.archive.jmx.Client HeapMemoryUsage:
committed: 2067267584
init: 2147483648
max: 2067267584
used: 594706040
zabbix-web配置
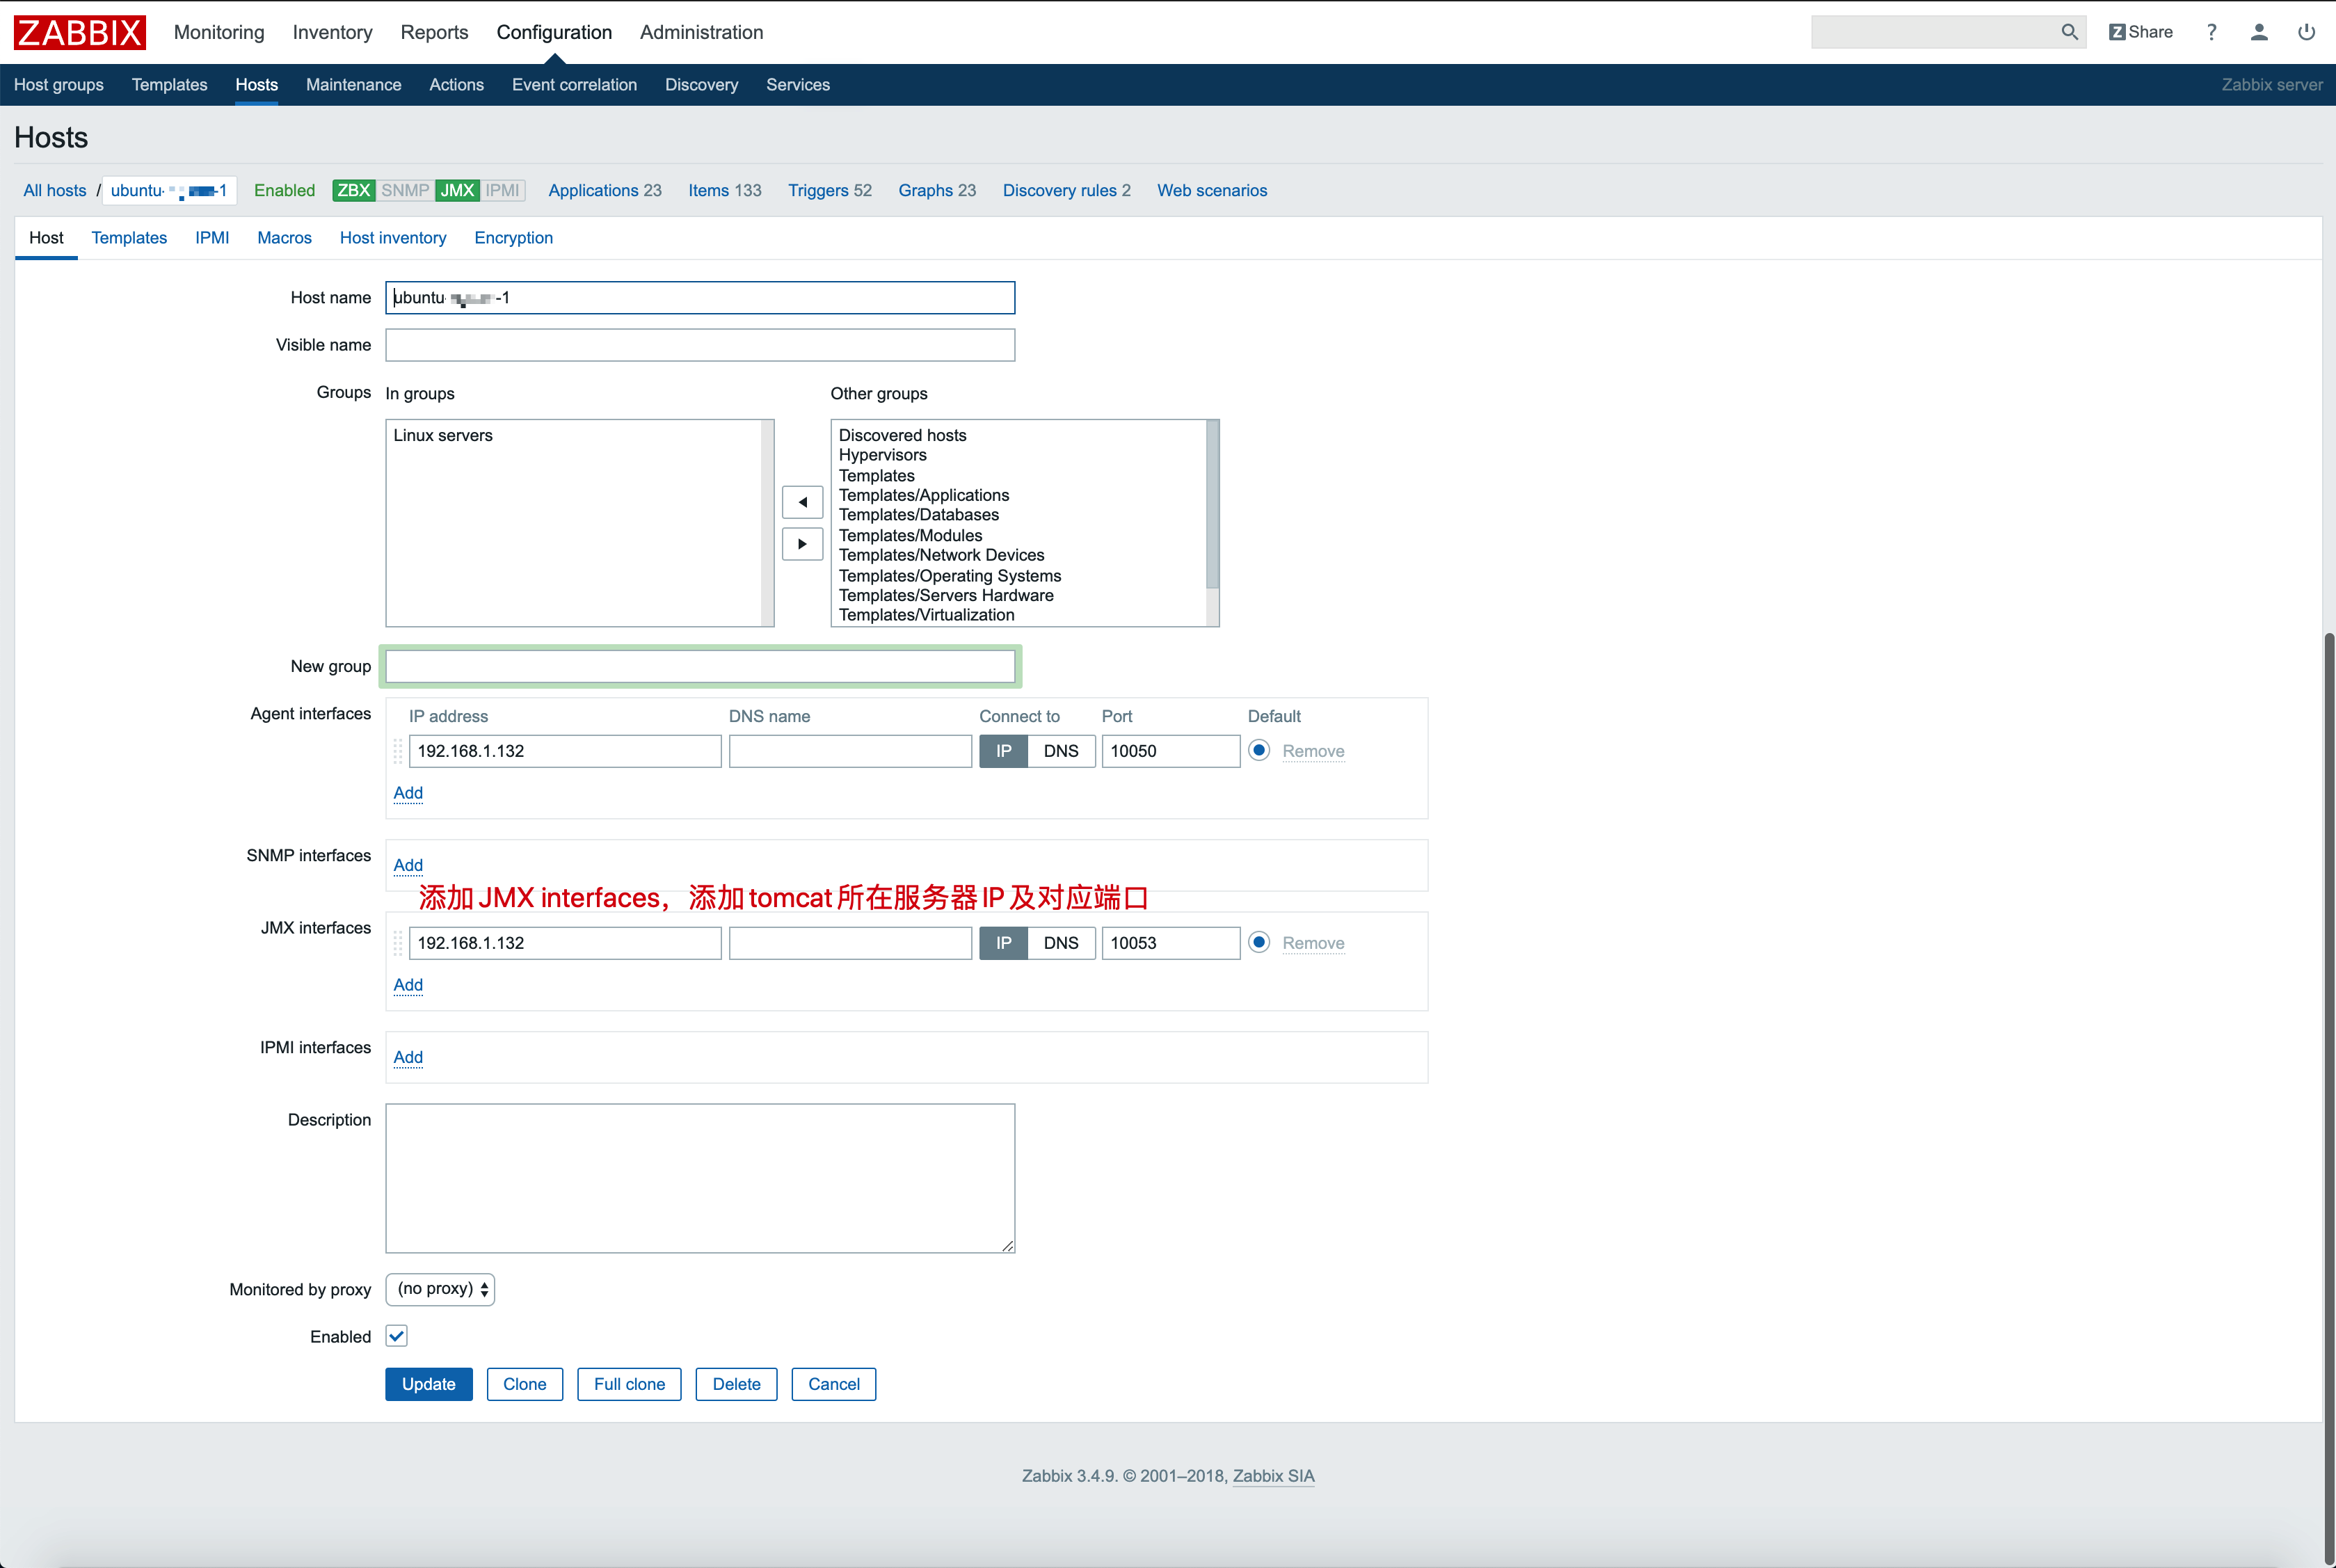
- 在host中添加
JMX interfaces
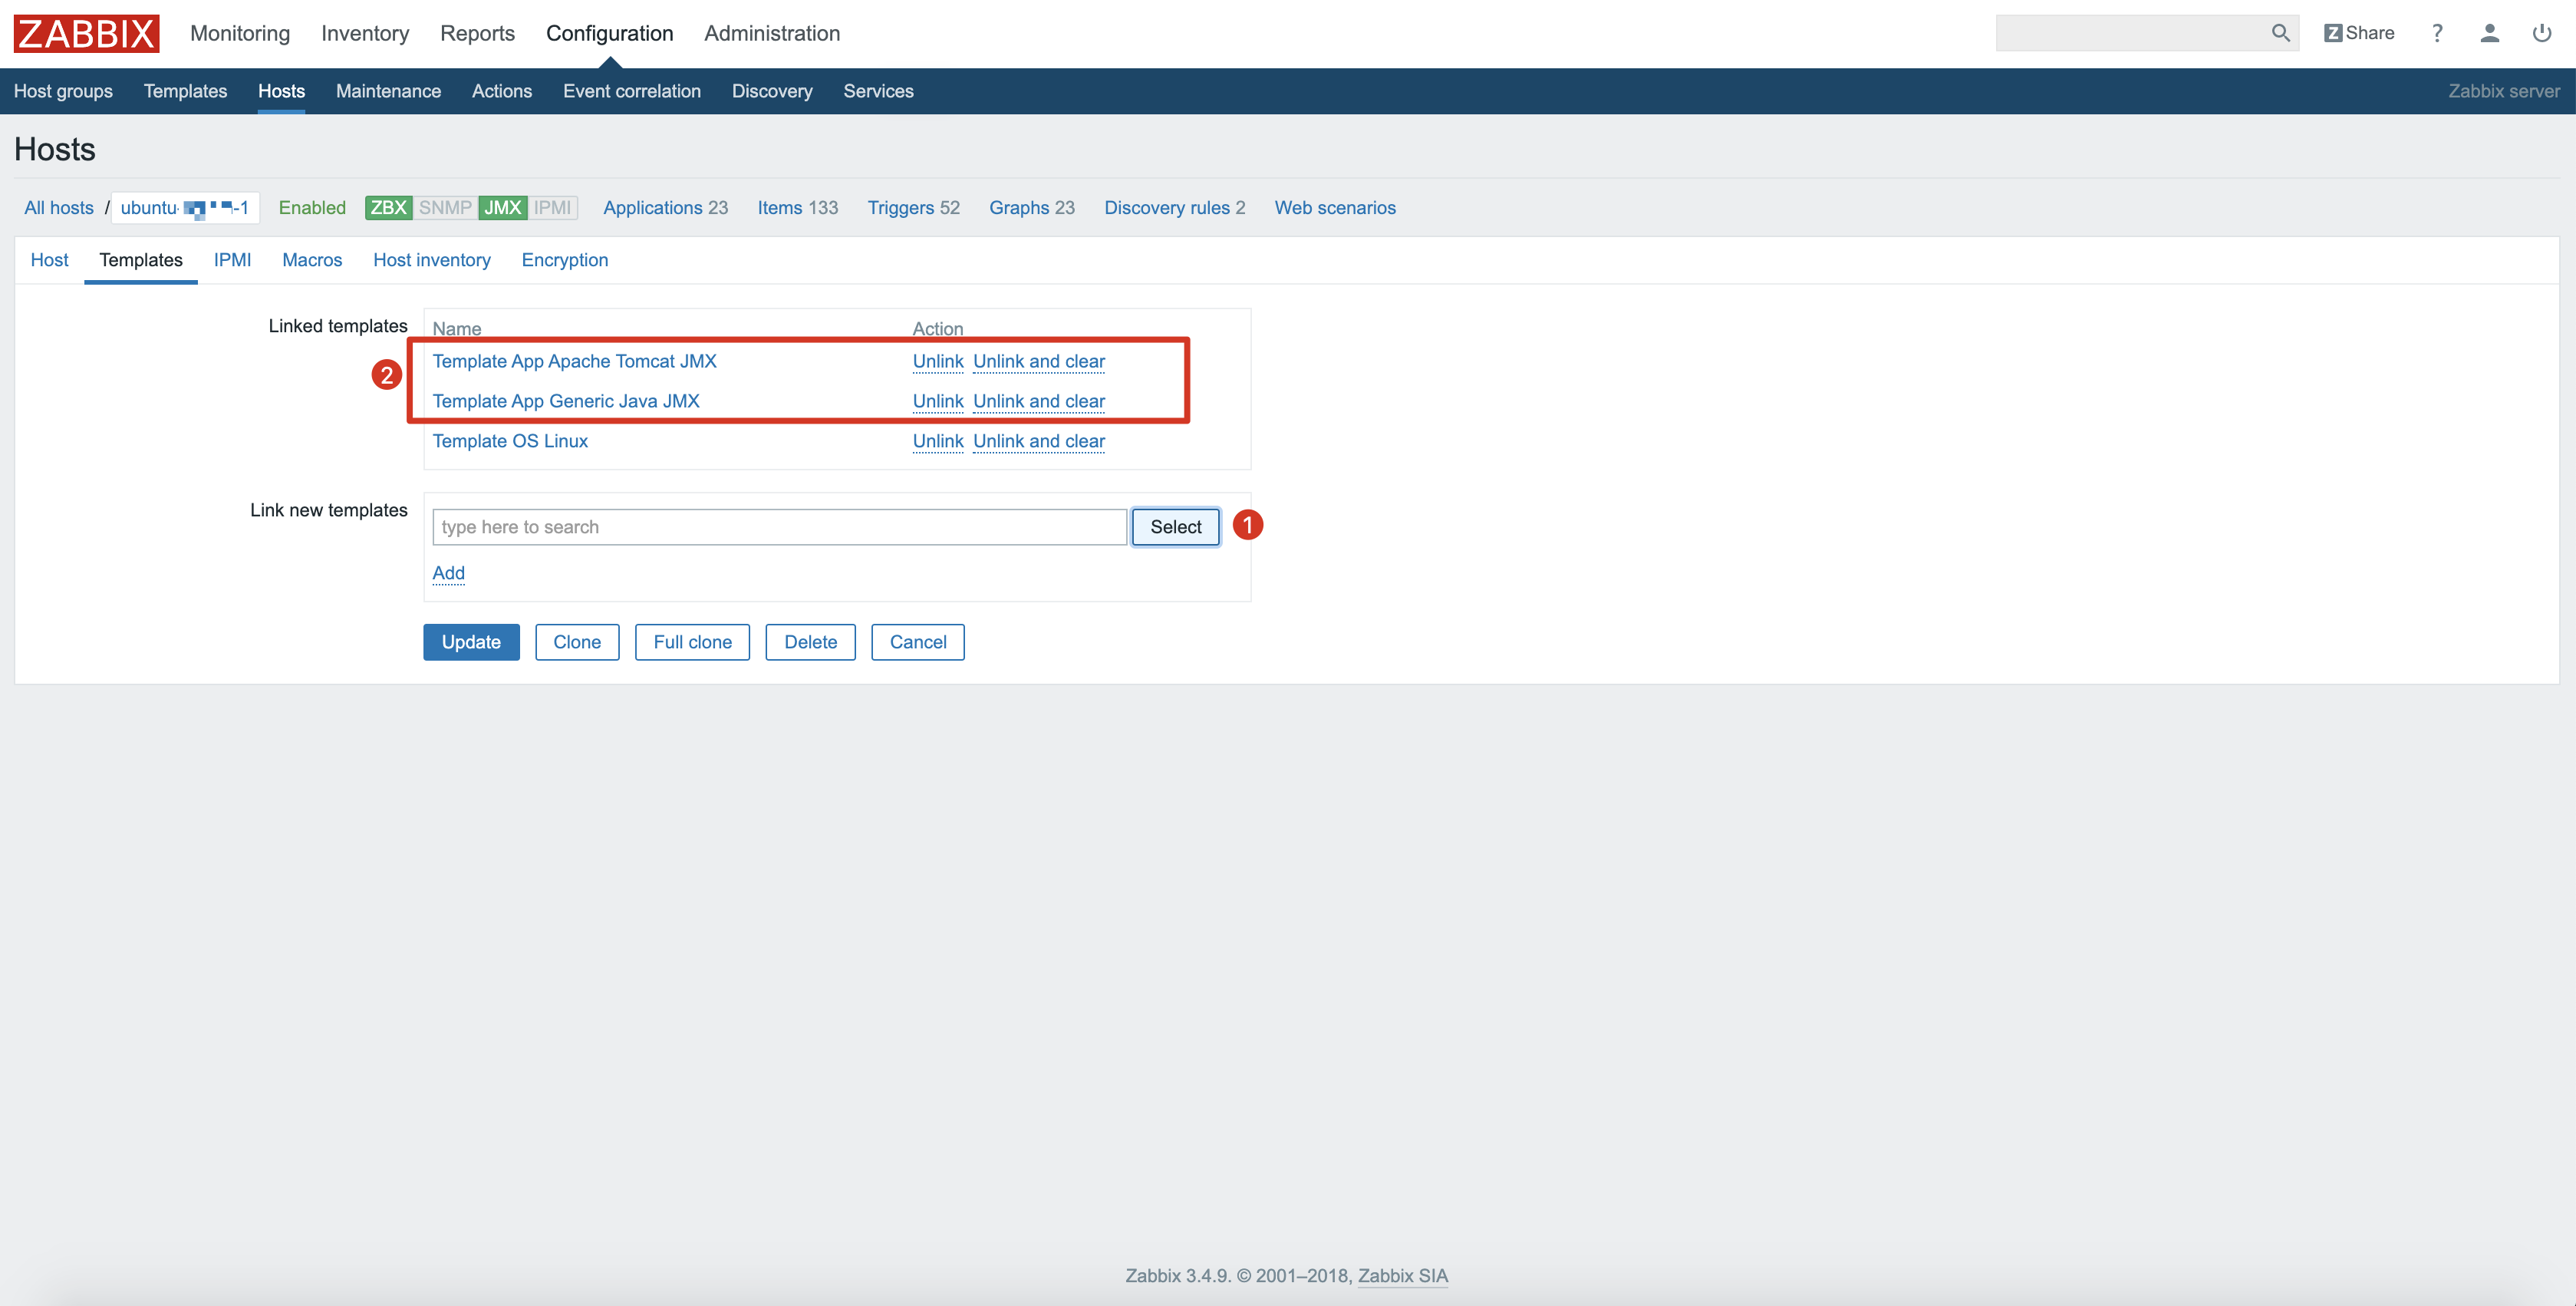
- 添加
template
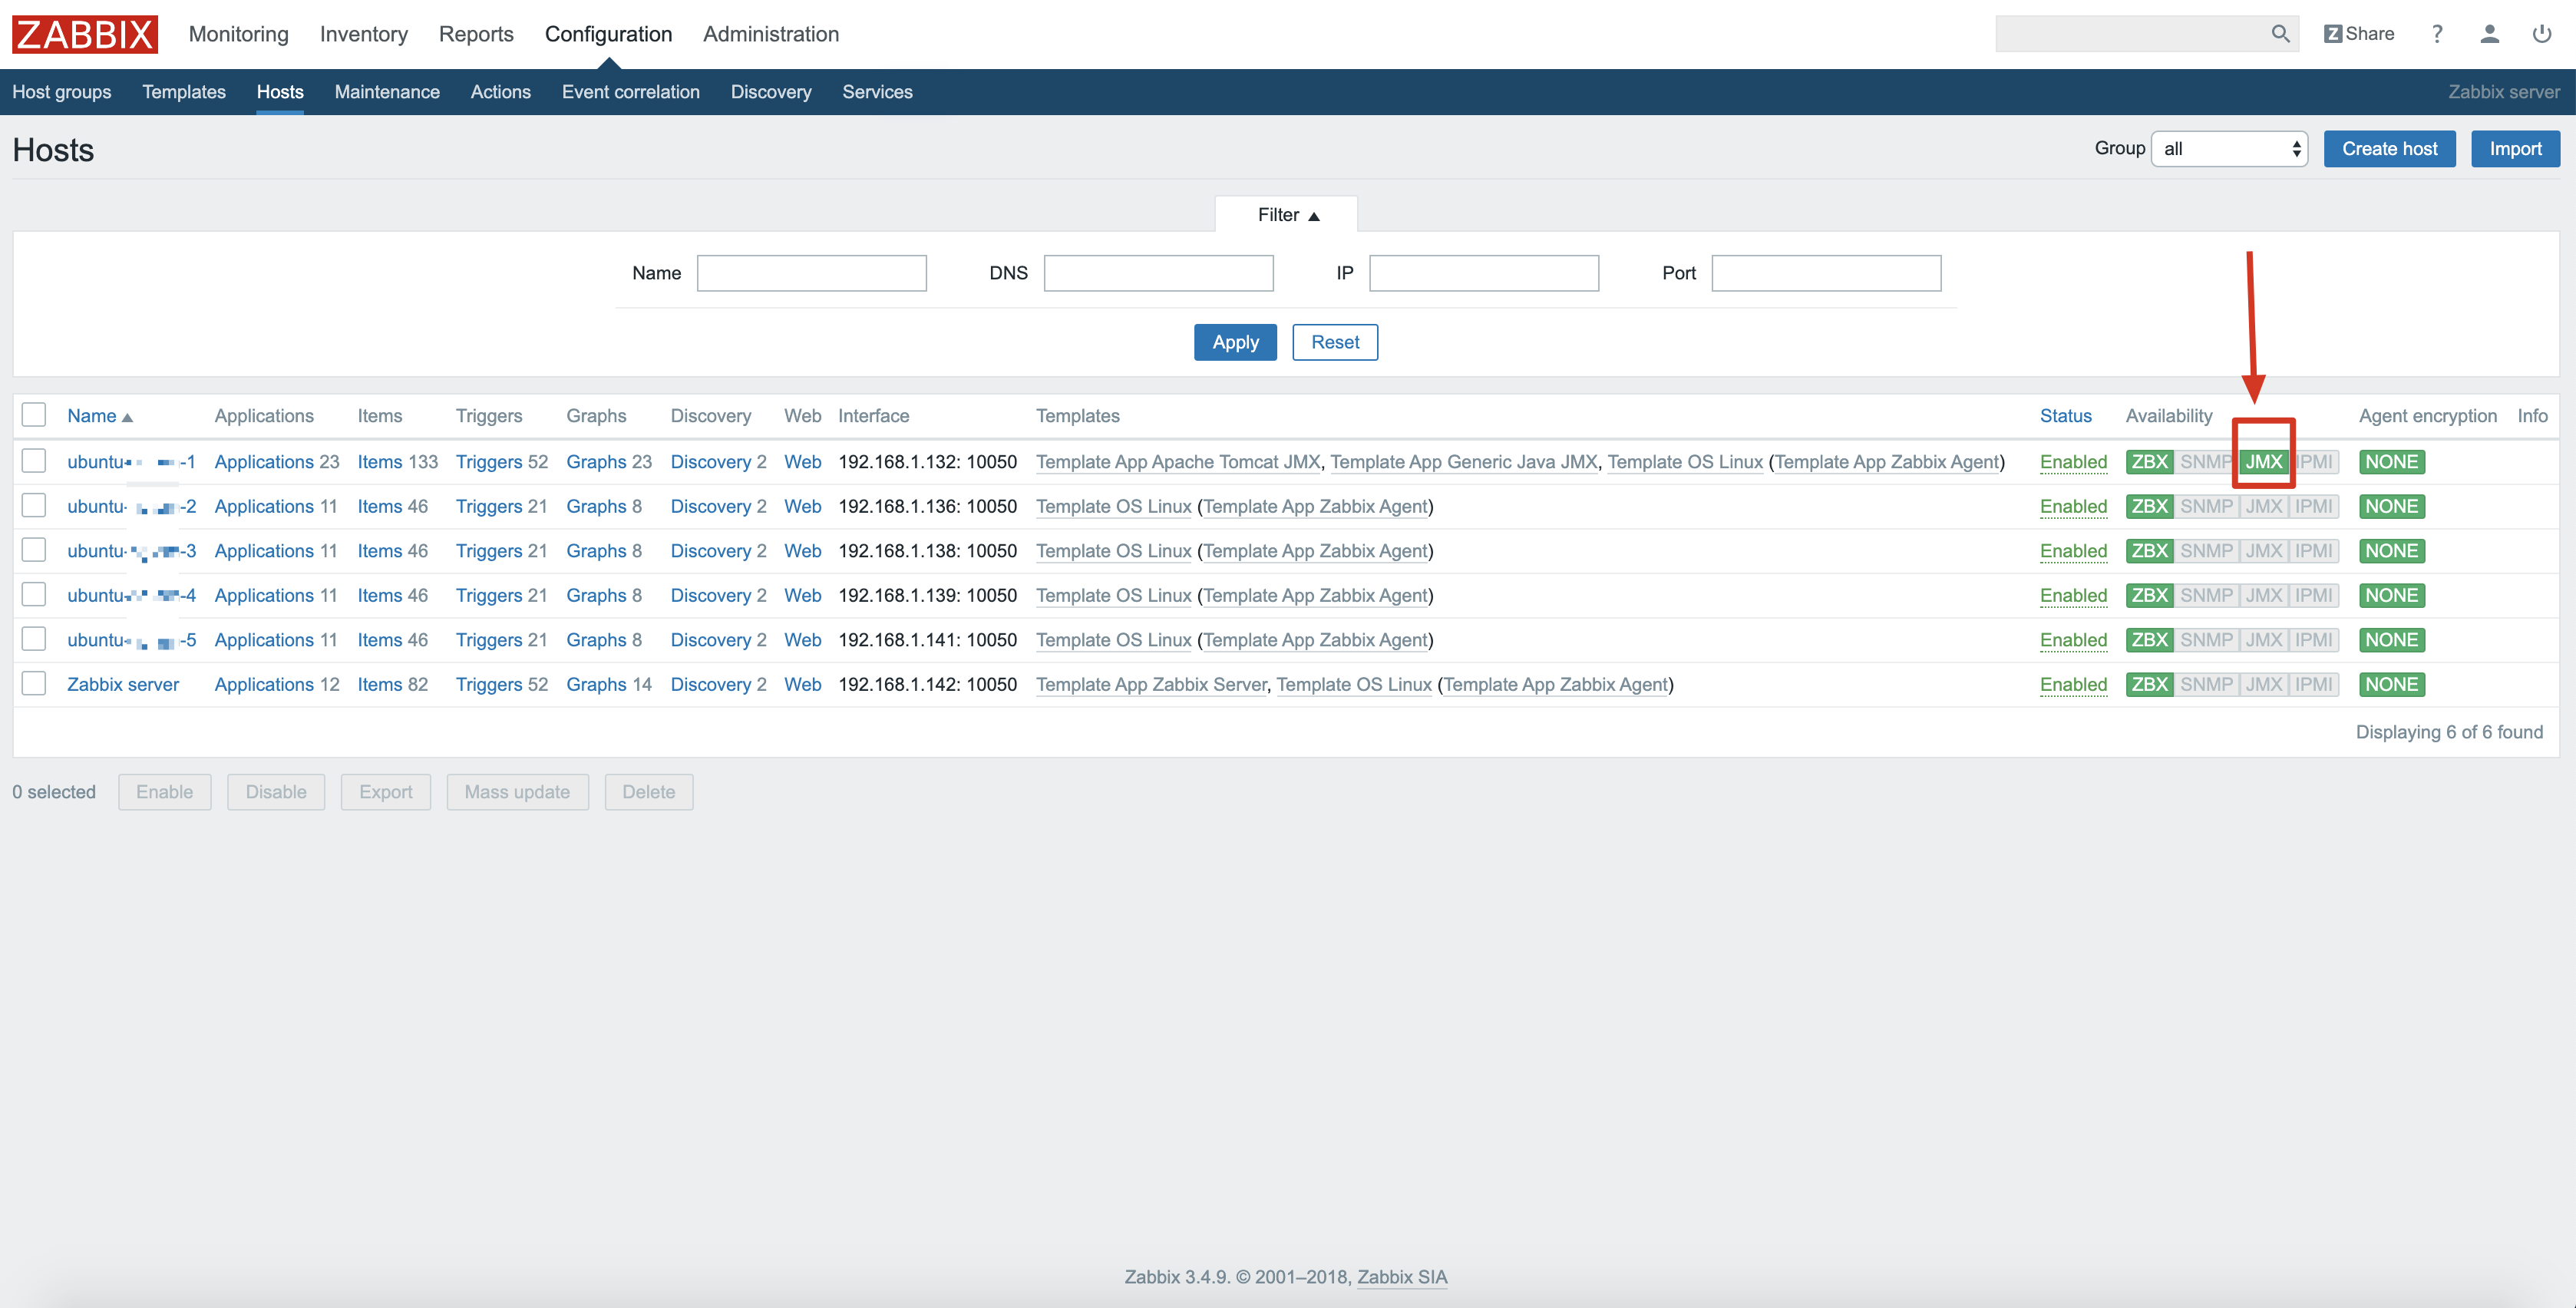
- 查看
hosts列表,可以发现已经显示有了JMX
- 本文标题:zabbix中添加java/tomcat监控(JMX)
- 本文作者:akiya
- 本文链接:https://little-star.love/posts/990471f0/
- 版权声明:本博客所有文章除特别声明外,均采用 CC BY-NC-SA 4.0 许可协议。转载请注明出处!